Behind-The-Scenes of Scenario Development
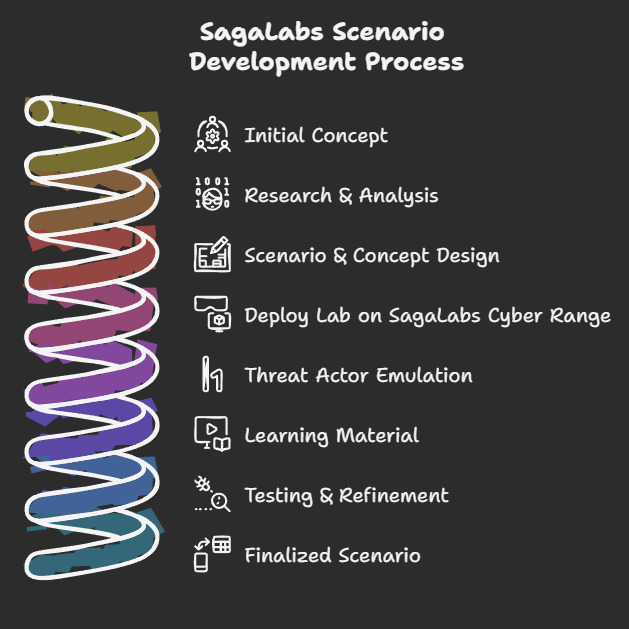
Ever wonder how we at SagaLabs create our scenarios, research, work in our labs, and finalize our product for people who board our Cyber Range? This blog post will explore the different aspects and explain how much effort and detail goes into building the best experience. Our development process is typically divided into eight sections covering all the elements that make our scenarios what it is.
Initial Concept
The initial concept for a lab usually originates from our Lead-Scenario designer, me (Christian), when I’m either in the metro, sitting on my turbo-trainer, swimming in the pool, or just sitting at my desk after a long day of doing incident response. I keep a long catalogue of ideas in a notebook that is erased, added to, or edited depending on what I’m faced with at work.
The concept usually starts with an idea, for example if I worked on a case where a threat actor have been utilizing a very odd behavior for exfiltration I would write down ideas to how I can teach others about this, and how we could make this part of a scenario or a separate lab dedicated to this technique.
The important thing about this is to emphasise the fact that everything for the concept has to be something that has been seen on real engagement - we want to get as close to the real-deal as possible.
Example ideas for future labs could be (wink wink):
BEC Compromise w. Enterprise application consent
AWS Lambda Abuse & Persistence
Bitmap Cache Reconstruction
Fake Captcha Phishing
APT39’s Espionage Operations
Research & Analysis
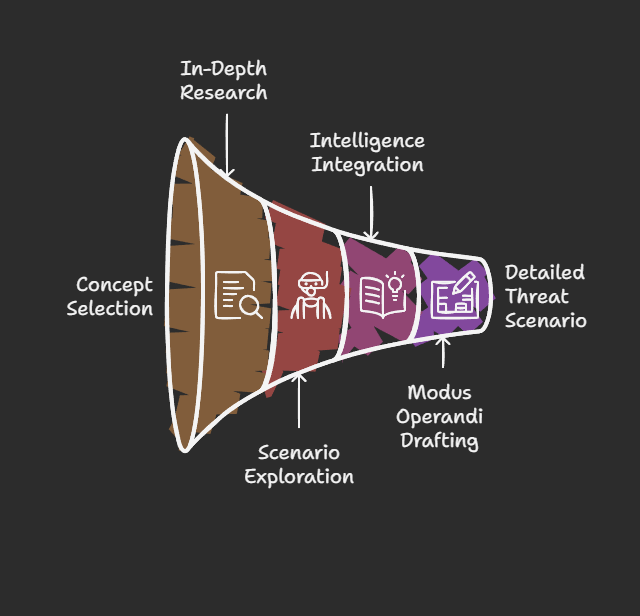
Once we decide to move forward with a concept, we dive into in-depth research on the threat or scenario. This can take quite a lot of time, as it is here the scenario designer dives into the deep waters of what is possible, how it works, and what the purpose should be. Often, we get inspired by open research from talented authors of incident and threat intelligence reports by CrowdStrike, Unit42, TheDFIRReport, Mandiant, etc.
In this phase, we start drafting the modus operandi for the threat actor that will be emulated in the scenario, for example, mapping:
Initial access: as to how the threat actor (TA) gets initial access, which could, for example, be through a VPN brute force attack.
Execution: What kind of tooling and malware does the TA bring to the environment, and what kind of language is that malware written in? Is it something we have to recreate ourselves by dedicating time and resources to develop that malware?
Lateral movement: How was the TA able to move laterally through the environment, maybe with SMB?
Then, we move throughout the whole MITRE ATT&CK framework as we start to shift closer and closer to our next phase: Scenario & Concept Design.
Scenario & Concept Design
This is following our previous phase, but now things start to take shape into something actionable. We start creating a more thorough modus operandi, including a detailed story that reflects what kind of company is getting impacted by this threat.
This could, for example, be putting down a detailed system configuration for how the naming convention, applications, security tooling, and OS patch levels should be used in the environment to get as close to realism as possible. This can be done by the scenario-designers’ several years of industry knowledge into consultant and core infrastructure involvement.
This step is crucial for making the lab realistic, and we put a lot of effort into making the environment feel like a real environment with real users, documents, and usage so that the participants can find valuable artifacts.
After this phase is complete, we end up with a product that includes a emulation plan, a scenario description, and some context that will be used for building the Cyber Range.
Deploy lab on Cyber Range
As we move closer to more technical implementations, things start to get more trial-and-error, as it can be quite difficult to make an environment vulnerable. Our lab designers use everything that has been created previously to build the lab through our platform, including setting up the different servers, client machines, applications, and data all automatically.
After several years of building this platform, it makes us spin up an environment for a new scenario with a click of a button - everything in the Cloud - uuuhh.
Threat Actor Emulation
Now the fun begins. It’s time to hack the environment. We have set up all the correct monitoring with the help of our platform, all hands on deck in the SOC, ready to tackle an incident - nah, it’s not that fancy, unfortunately.
Again, we go back to our previous stages and look at the modus operandi, and if the intel tells us that the TA operates outside of business hours, we, of course, also have to do that - again, we try to get as close to the real thing as possible. This means that I have to work throughout the night on a Saturday - yes, that is not normal for me, as I’m usually sleeping at 10 PM, even on a Saturday. 😂
Yes, this looks like me. Hack hack, exploit.exe
Learning Material
Now that the environment is owned and compromised by our TA, it is time to capture what just happened. This brings a lot of value to SOC, Incident response teams, and other internal security teams that have never experienced what it feels like to face a real incident. Now it’s their time.
But we can’t just give them a freshly pwned environment - they simply won’t get that much value out of it. Therefore, we will establish some goals for what we want the participants to learn, and from there, develop the didactic material that can be used for the lab.
Our platform features steps and guidance throughout the scenario, so there will be immersive questions that challenge the participants on their technical and critical thinking.
An example could be to utilize a common forensics tool to recover files from slack space to find the answer.
Another challenge could be to make a containment strategy for the incident based on the story given in the scenario. We try to make the experience as immersive as possible.
The learning material is essentially what makes up the experience for the participant, so we make sure we do not rush this step and often try to get the participant as much hands-on as possible.
Testing & Refinement
Great, now the scenario has gone through the steps of being contextualized, built, hacked, and captured, and learning material is created. Now, it’s time to test the scenario.
We peer review ALL of our labs and scenarios with our highly skilled instructors, who come with the same or also different backgrounds. We want to ensure that there are challenges for each type of participant; some focused more on the technical aspects, whereas others are focused more on the strategic or management involvement that occurs under an incident.
After the peer review, we refine the lab based on the feedback and make the last final touches for on the platform to make it cremé-dele creme. This stage can take a lot of time, as we go into the details of the questions, challenges, and description of the lab to ensure that the participant gets the best experience.
Finalized Scenario
Now, we are done. The end.
Nah, there are a few more steps to be made, for example, ensuring that a few beta testers outside of our instructor network test the scenario, and also we are creating marketing material, PowerPoints for instructor-led trainings, and much more. But the goal is to have a product that can be sent to our testers and after testing, we will launch the scenario, ensuring that it has been through several testing stages and the scenario is created as realistically as possible.
As our motto says, “Train as you fight”, we make a virtue out of training as close to the real incident as possible.
I hope you enjoyed this article about the insights into how we at SagaLabs create our labs and scenarios. If you have any questions, feel free to reach out to me at [email protected].
We hope to see you soon.


